
 Photo and instructions courtesy of Obstinate Pursuit
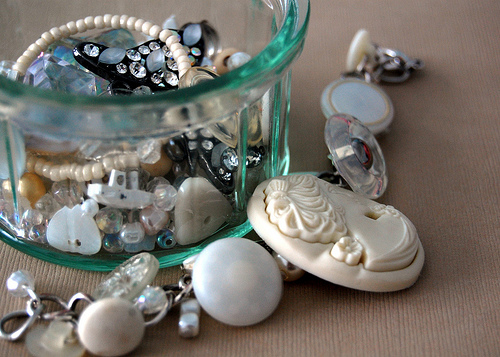
Pick those long-forgotten buttons out of the craft box and turn them into a piece of jewelry!If you’re a crafster, you probably collect your share of cute buttons that are just sitting around waiting for a project like this. To make something that goes with any outfit, we recommend using different sized buttons but staying with one color palette, like this Victorian-inspired bracelet is truly greater than the sum of its parts!
Materials
- Buttons (shank buttons are easier to attach, but any will work)
- Beads or smaller buttons.
- Jewelry pliers and wire cutters
- A few headpins and jump rings
- A ‘charm’ style bracelet or chain with sizeable links and a closure fitting
Instructions
1. Start by counting the number of links on your bracelet chain, then choose a corresponding number of beads and buttons. Lay them out along the bracelet chain – without attempting to fix them in place. Re-arrange the beads and buttons until you find the arrangement pleasing to your eye – it may help to start with a large focal bead or button in the centre.
2. Open the central link of the chain using the pliers and attach the button directly onto the chain link by ‘threading’ the chain through the shank fitting. Close the link securely.
3. Continue to attach your buttons to the chain using the same method, leaving empty links between the buttons if necessary. (Sometimes, the shank fitting of the button may be a little too tight for the chain link to pass through easily. Don’t force it through or you may risk damaging your buttons. Instead, ‘thread’ a jump ring through the button and then attach this to the chain link)
4. Once you have buttons attached along the length of the bracelet, try wrapping it around your wrist. Check the drape and ‘fullness’ of the bracelet and, if you feel that it needs extra beads or buttons, spread it out and decide where to add your extra beads and buttons.
5. To add your beads ‘thread’ the beads onto a headpin.
6. Using your pliers, form a loop at the top of your headpin and then snip off the excess with your wire-cutters. (If you don’t have any wire-cutters, instead of forming the loop first, grasp the headpin firmly with your pliers about 1cm above the topmost bead. Bend the wire back and forth until it snaps. Now use your pliers to form a small loop closure)
7. Open the loop closure slightly and add the headpin to a chain link. Close the loop securely.
8. Continue to add additional beads and buttons to the chain until you are happy with the drape and fullness of the bracelet.
Thank you so much for the article. We enjoyed reading this article! Would you like to be guest writer for my blog?
Just wanted to say I enjoyed the site. You have really put a lot of time into your content and it is just wonderfull!
That’s adorable!
That’s pretty cool. I have a big jar of buttons, well okay severl jars, but they’re not as ornate and lovely as those.
There may be noticeably a bundle to know about this. I assume you made certain nice points in features also.